Beginners' tips for canyoning in North Queensland
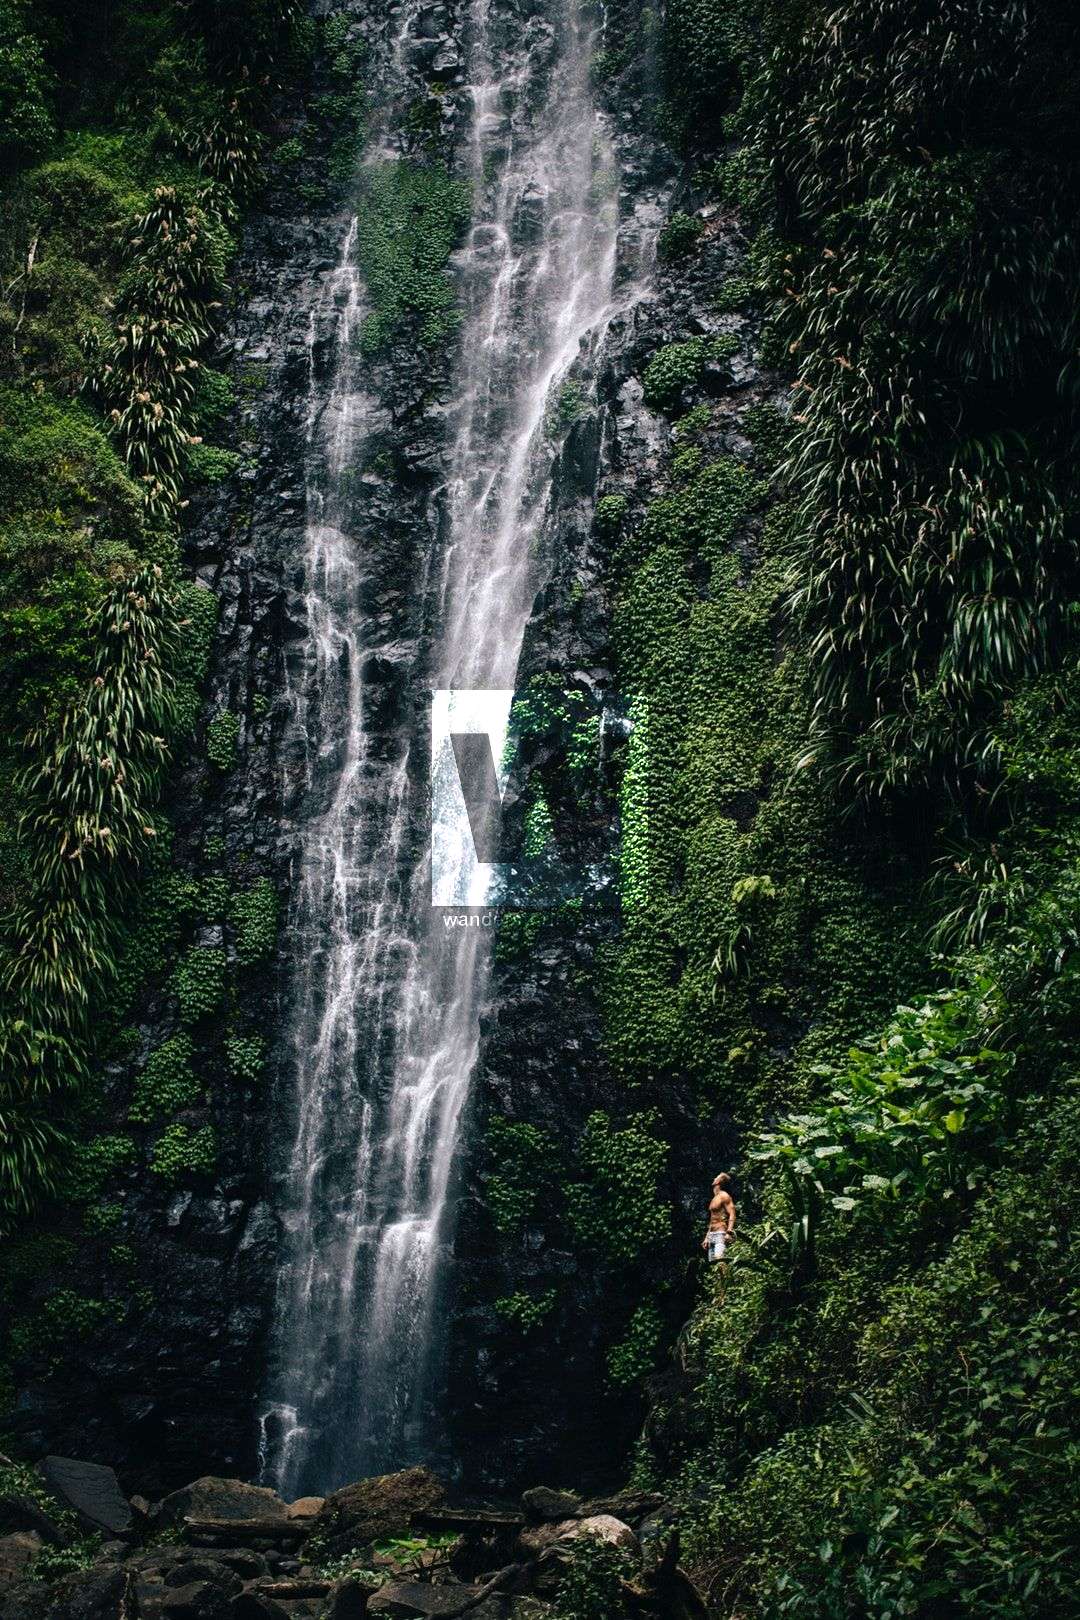
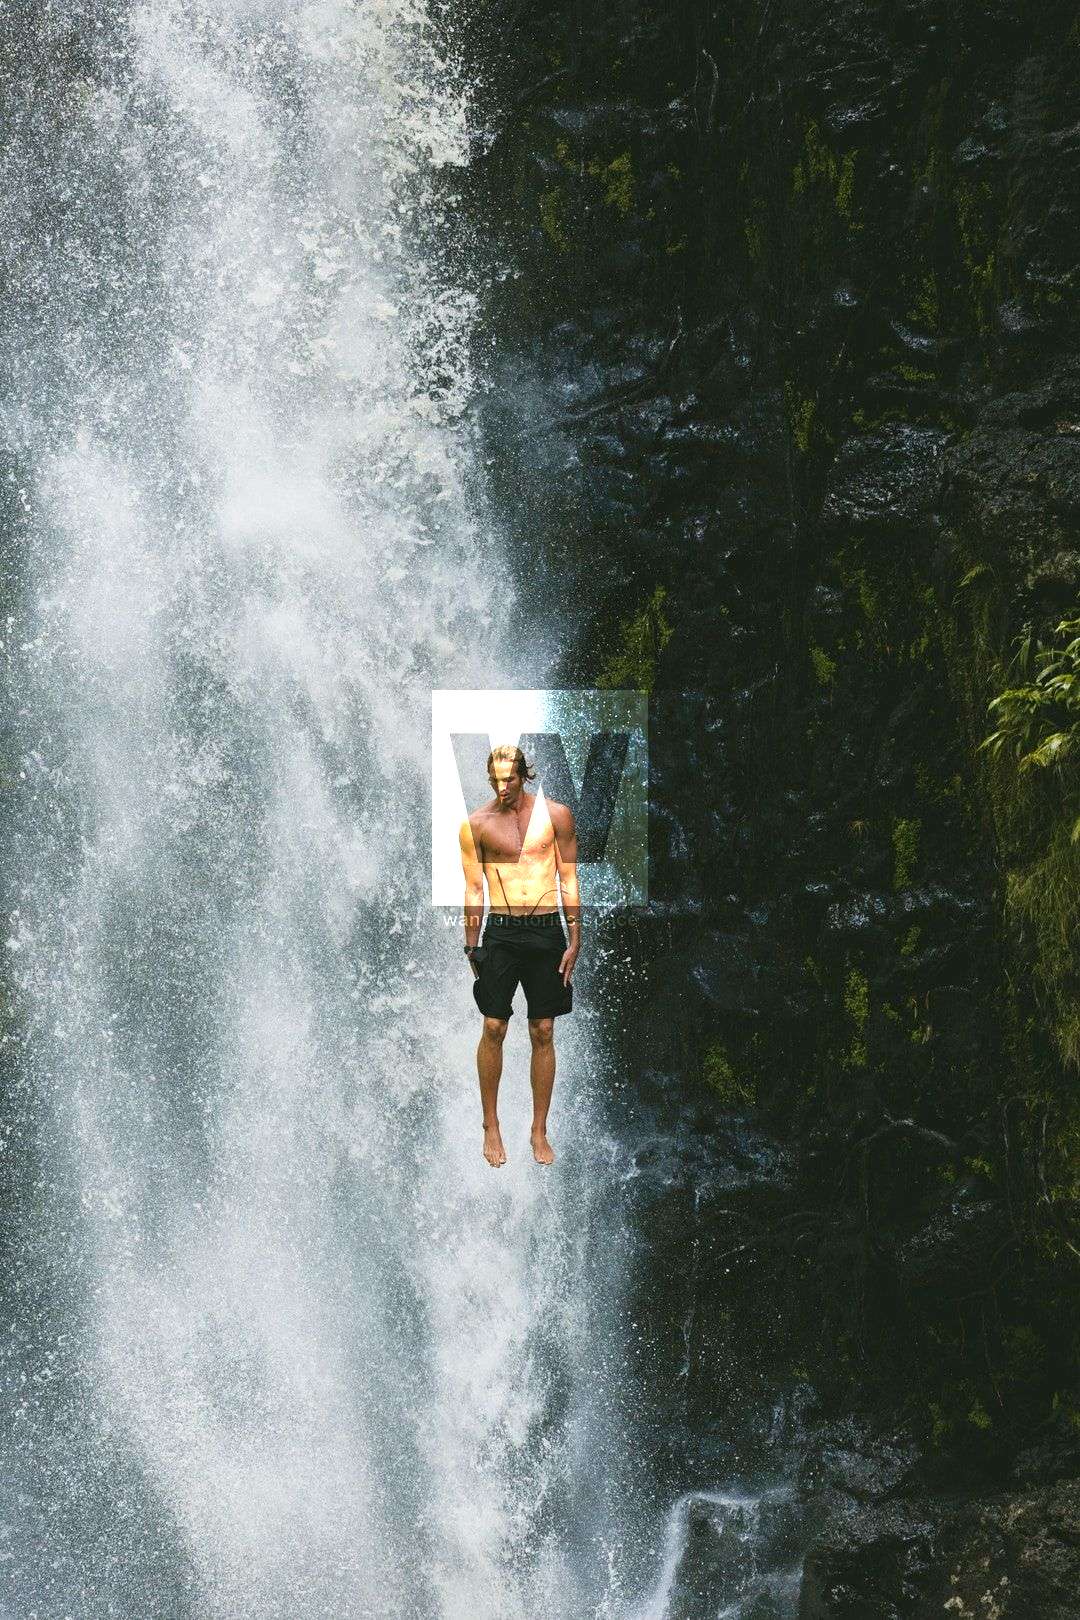
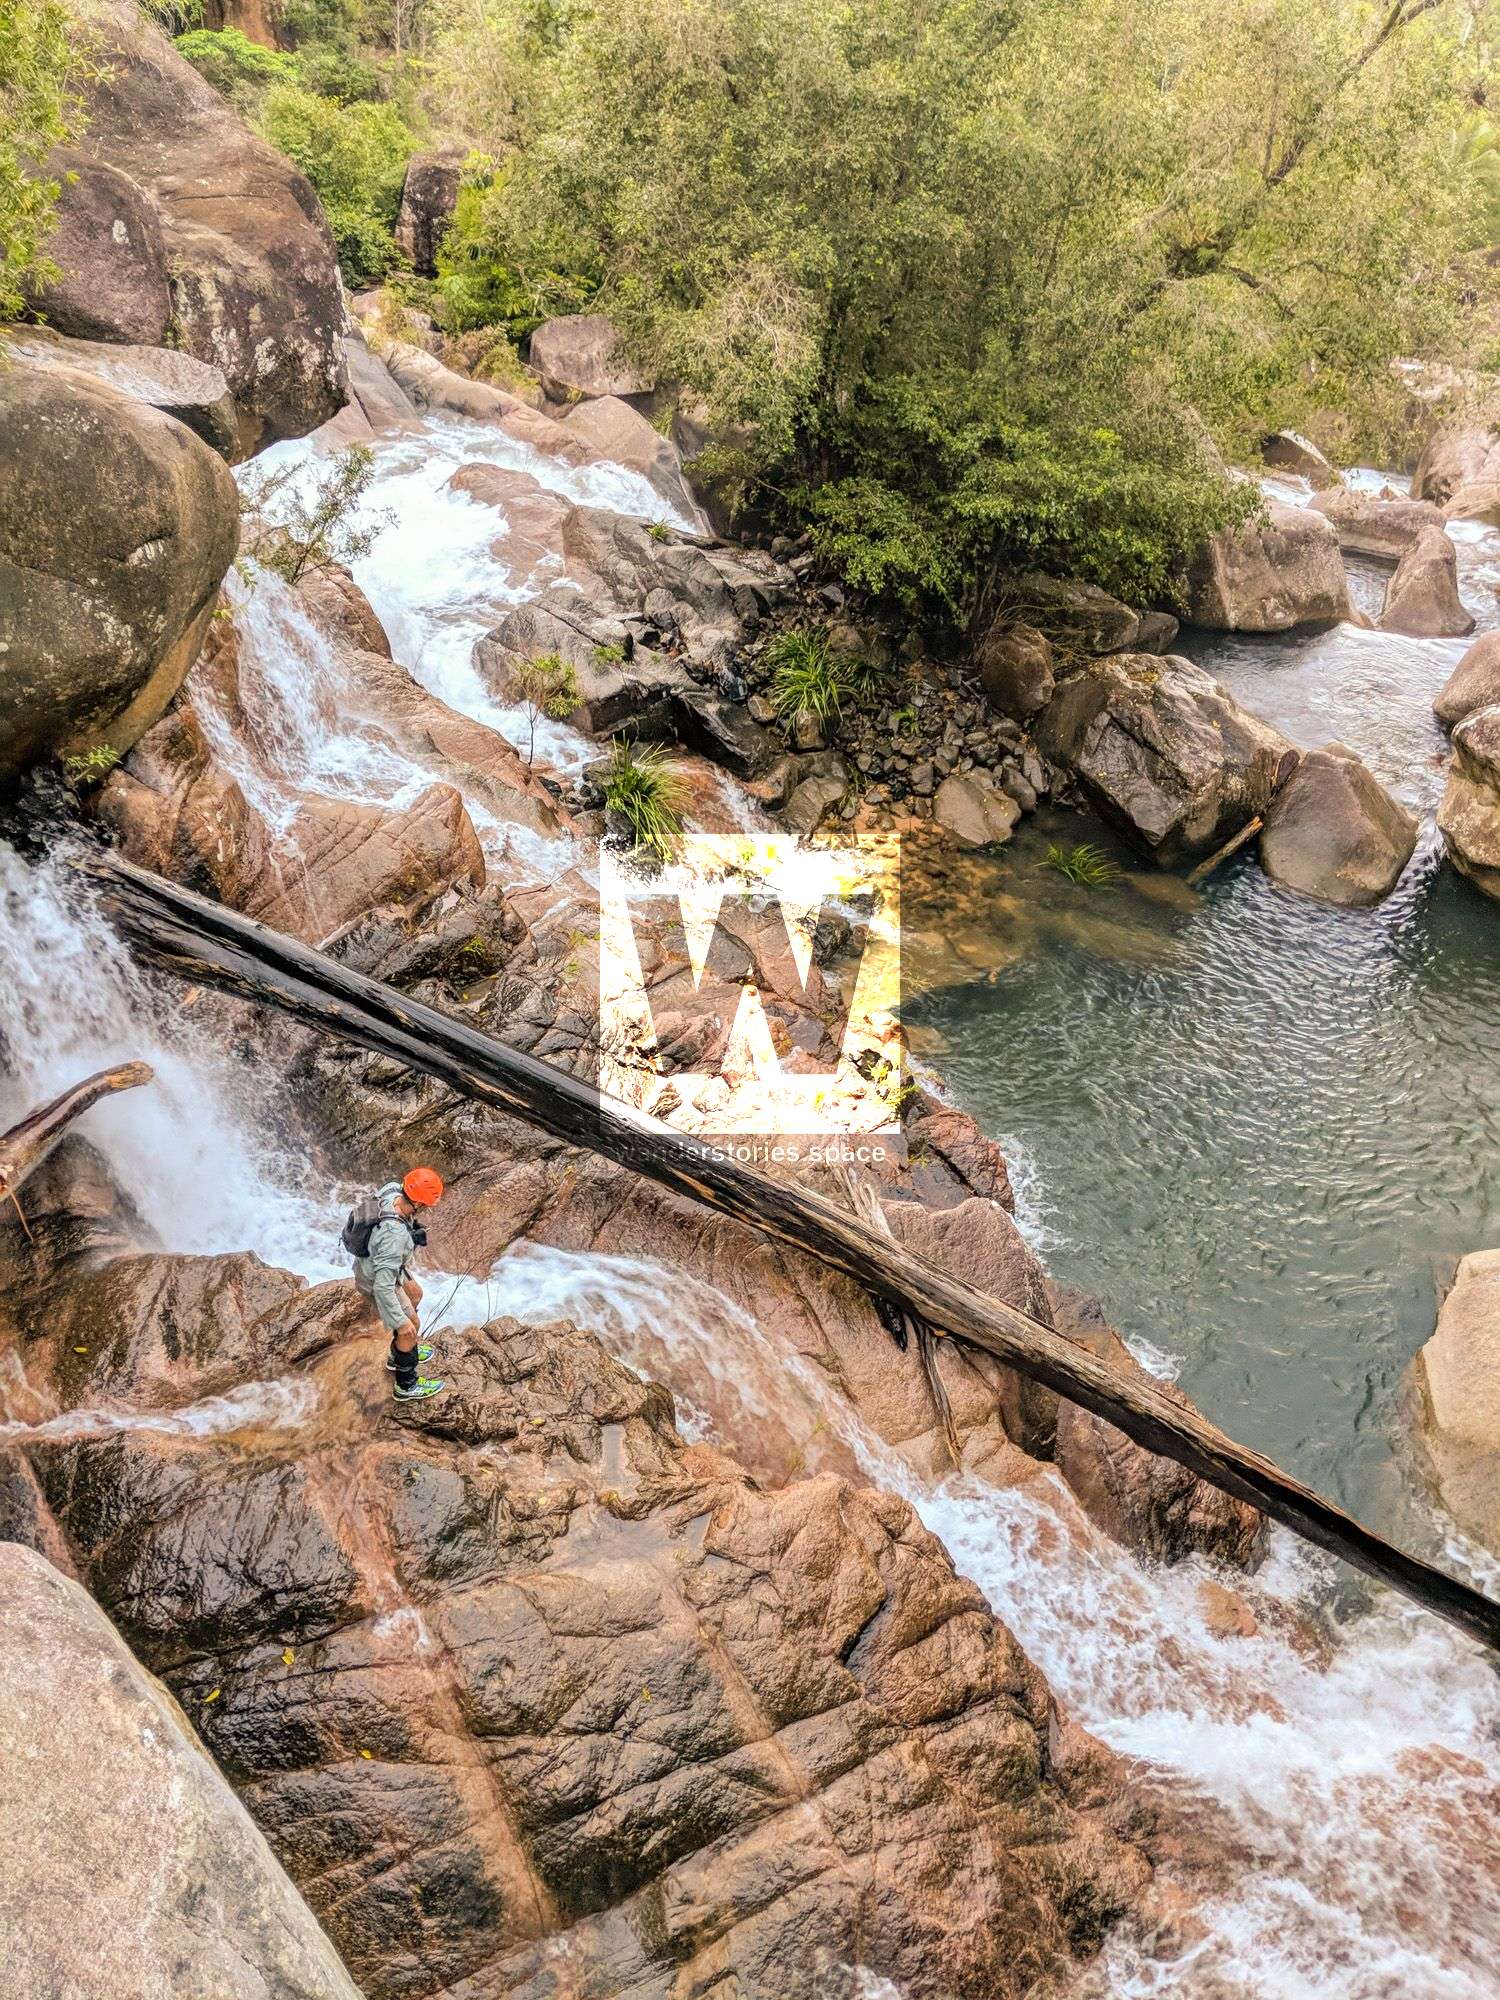
Canyoning involves a free-flowing watercourse that has drop offs, waterfalls, gorges, canyons and caves where you will be rock hopping, scrambling, jumping, abseiling and swimming. You're likely to get wet!


Note: As canyoning involves technical skills that will evolve over time with advances in knowledge and technology as well as various levels of risk, this article is only intended to provide helpful tips and inspiration and is not a 'how to' guide. Please read our disclaimer before you embark on your canyoning adventure!
A guide to canyoning in North Queensland
First off, let's start with my definition of canyoning:
Canyoning involves a free-flowing watercourse that has drop offs, waterfalls, gorges, canyons, and/or caves where you will be rock hopping, scrambling, jumping, abseiling, and swimming. You will likely get wet!
Canyoning is different in North Queensland, as there aren't many true slot canyons. This means that you can pretty much bail out at any point along the way, which reduces the commitment factor of these watercourses.
The Plan
It all starts with a good plan. Research online, and ask friends or the internet for information on the specific canyon you have in mind. If there's no information available, you will need to spend a bit of time mapping and planning the trip.

Choosing a route
Choosing your entry route wisely can save you a lot of time and effort. Look for walking tracks, old logging roads, etc. If there are none, look at terrain and vegetation for the easiest, most efficient path. Estimating the trip time can be difficult because there are so many factors involved; spend some time on this task.
Before you set out on your adventure, let someone know the route you intend to take and the time you will be back before they should alert authorities.
Weather
The weather is boss! Check the weather before you go. If the forecast is for rain, or the clouds look a little ominous on your way out to the canyon, leave it for another day. Heavy rain can turn the most benign creeks into rushing torrents. Come back another day. The creek will always be there.
A high flow canyon that is uncharacteristically pumping after heavy rain can be fraught with danger. Watch out for unseen log jams, hydraulic flows, flash flooding, and/or debris racing downstream as a jam upstream gives way. Are there places where a 'pinch' could occur? A pinch, a sieve, or a strainer, happens when high flowing water pins a person against a hard, immovable object - and in the case of sieve or strainers, flows through a smaller hole than the body. Please be mindful of these situations when you think heavy rain is an exciting time to go canyoning. No one likes slipping over on wet, slimy rocks all day. Think hydrology.
Also, it is important to ensure all members of your party can swim and have experience in abseiling and swift water rescue.
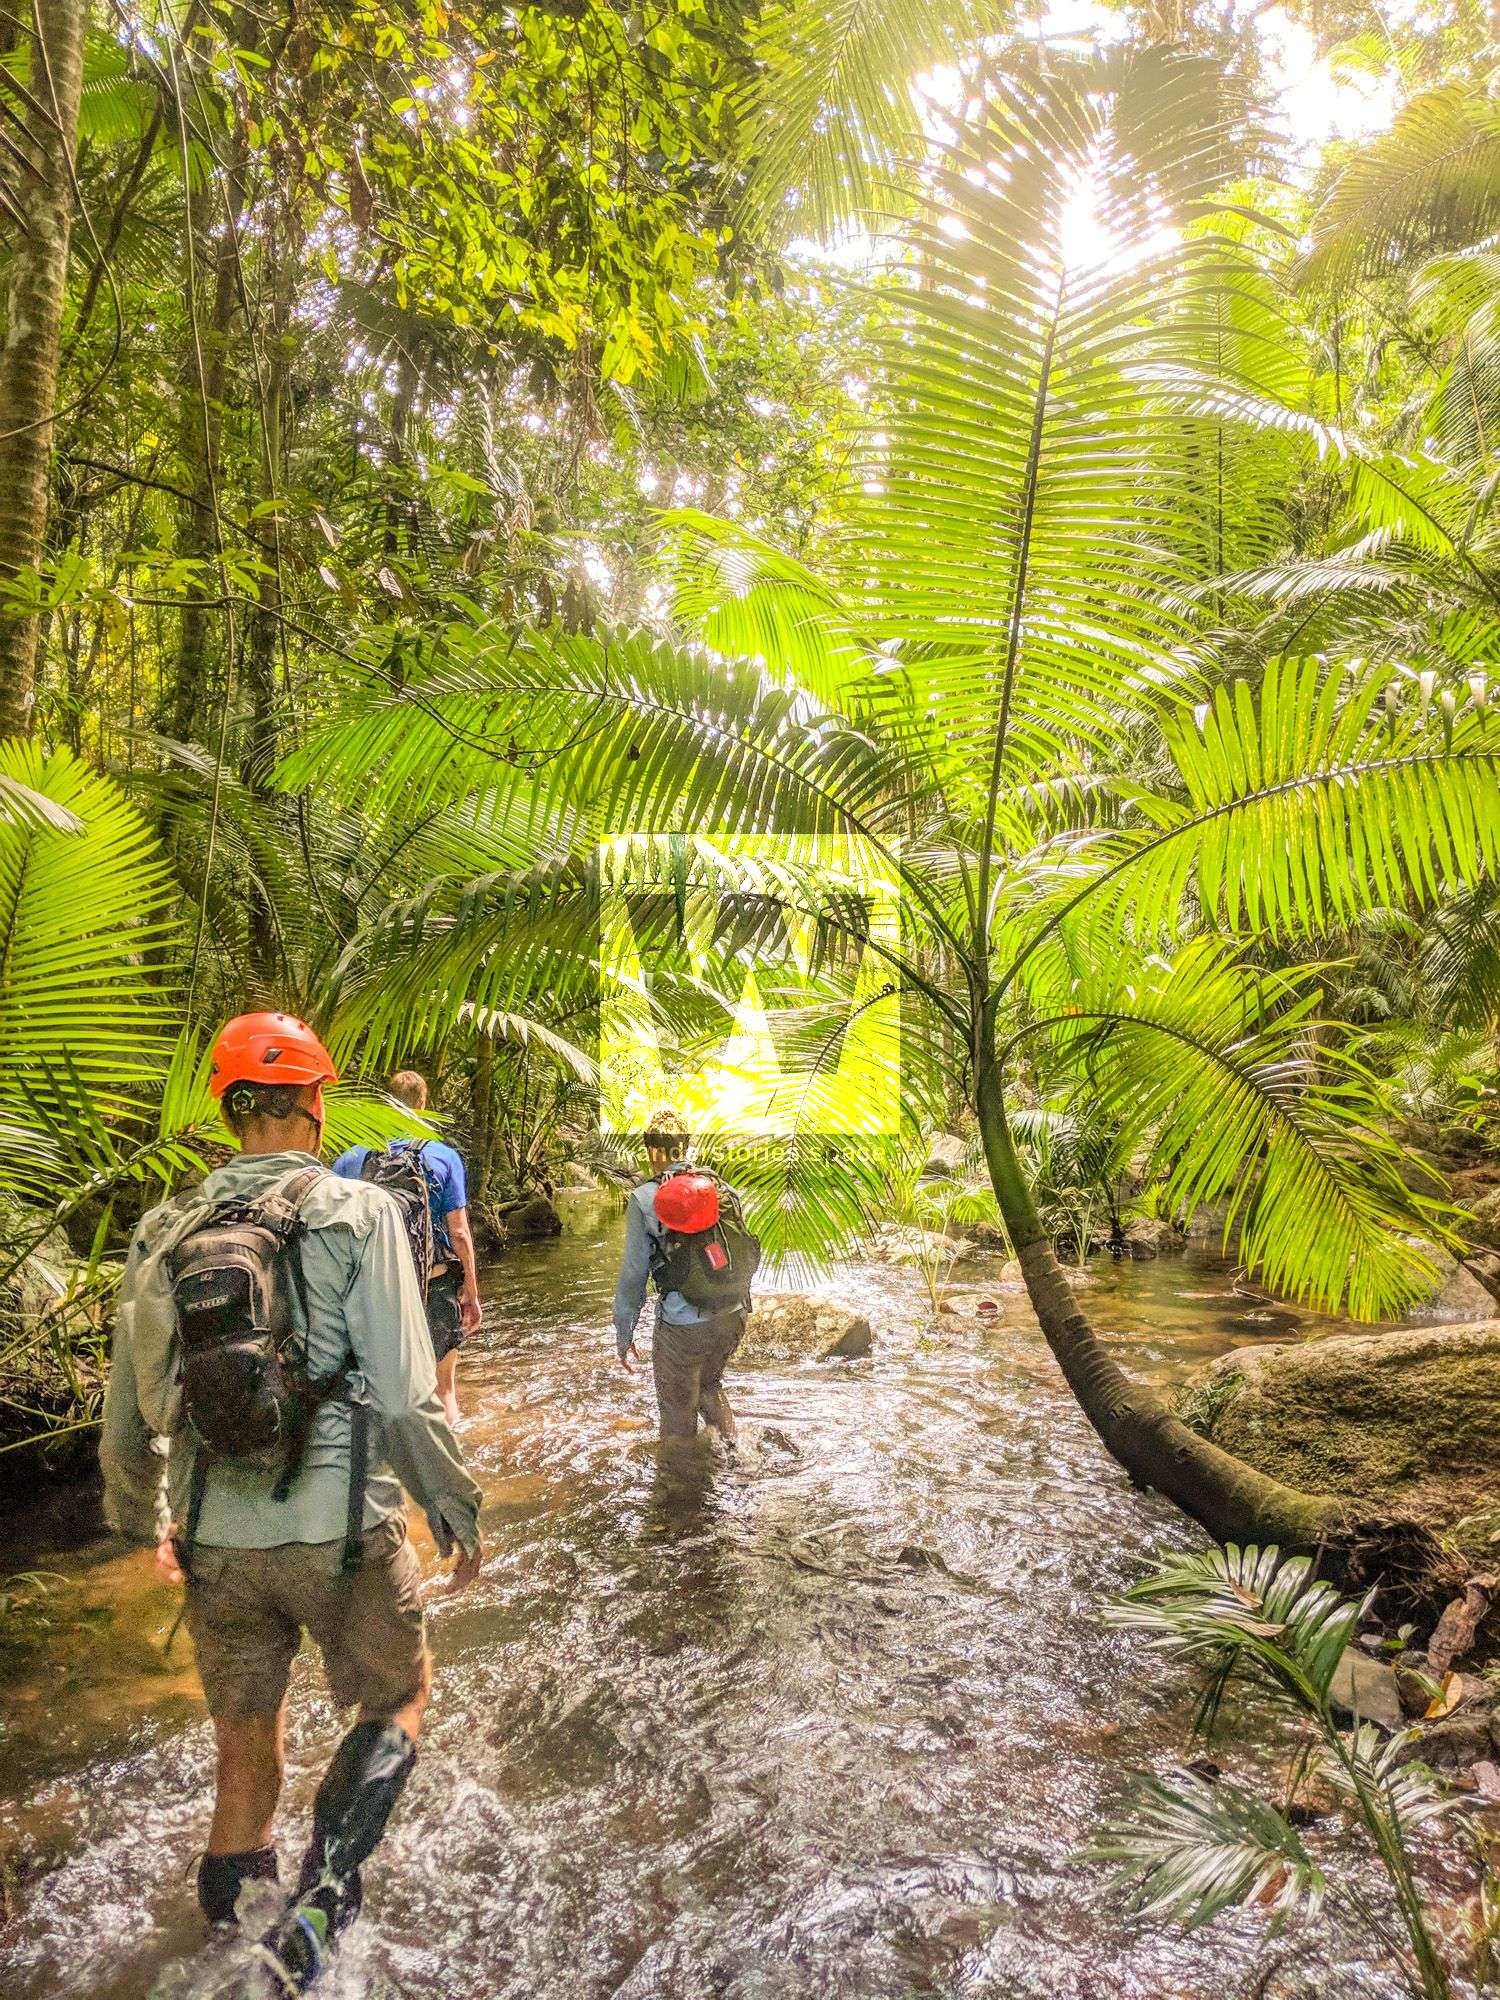
The Approach
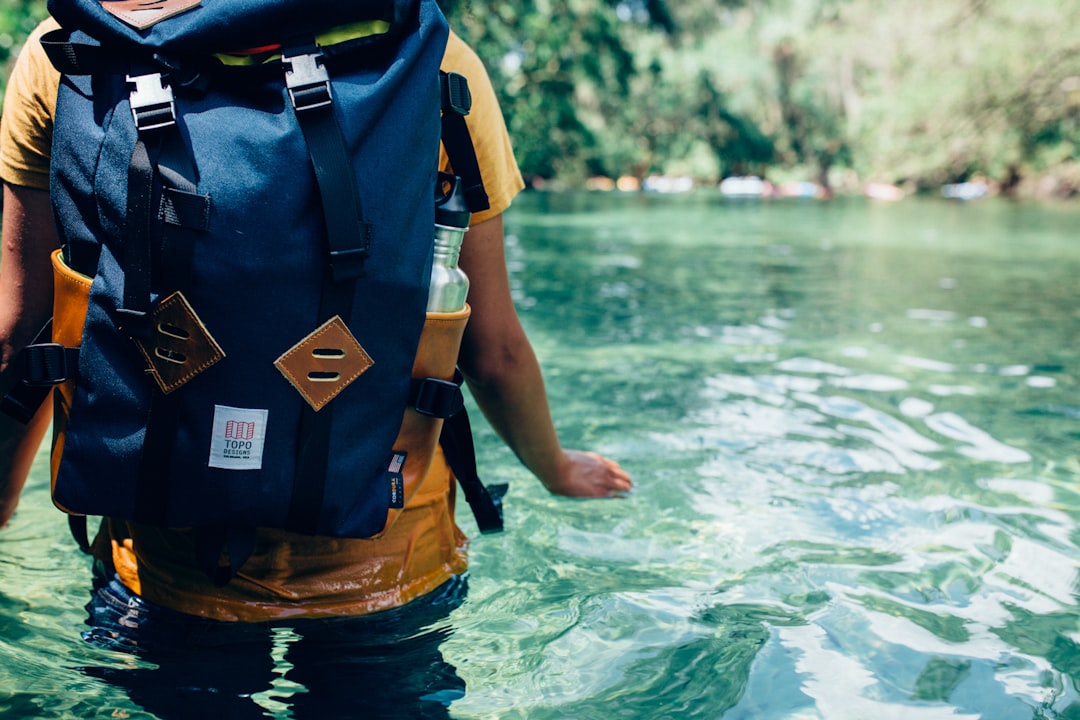
The approach into a creek or canyon often starts with a downhill hike. Before getting wet, stuff your electronics into a dry bag. Unless it's winter in North Queensland, you won't need a wetsuit. I like to wear lightweight, quick-dry clothing for hiking and canyoning. Cotton trousers tend to stick to your skin. Jeans are even worse.
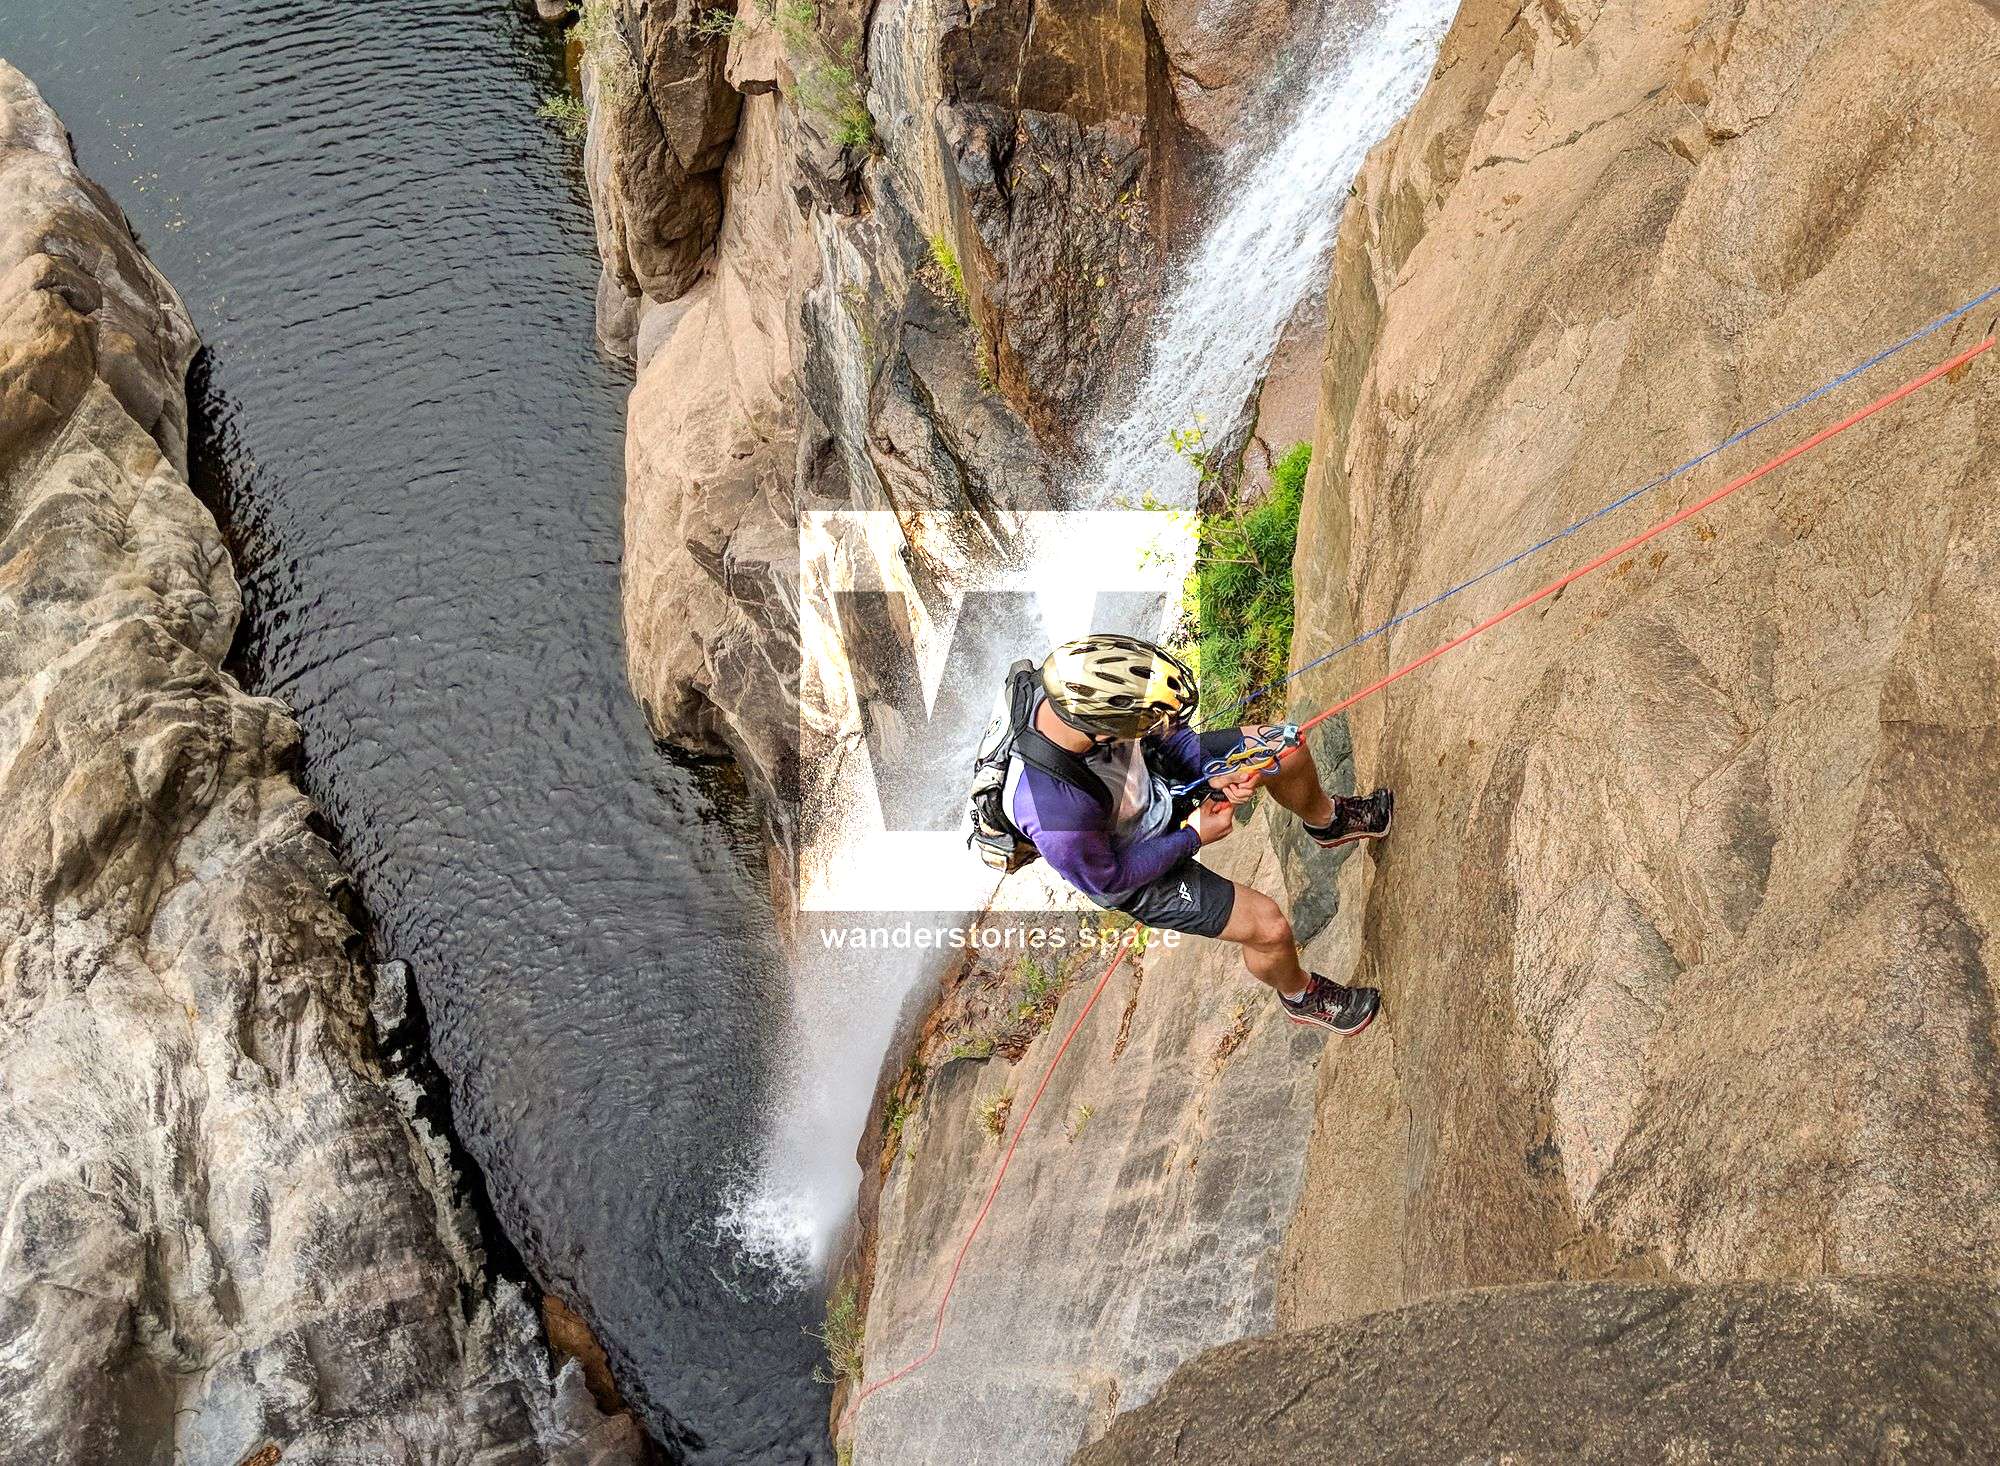
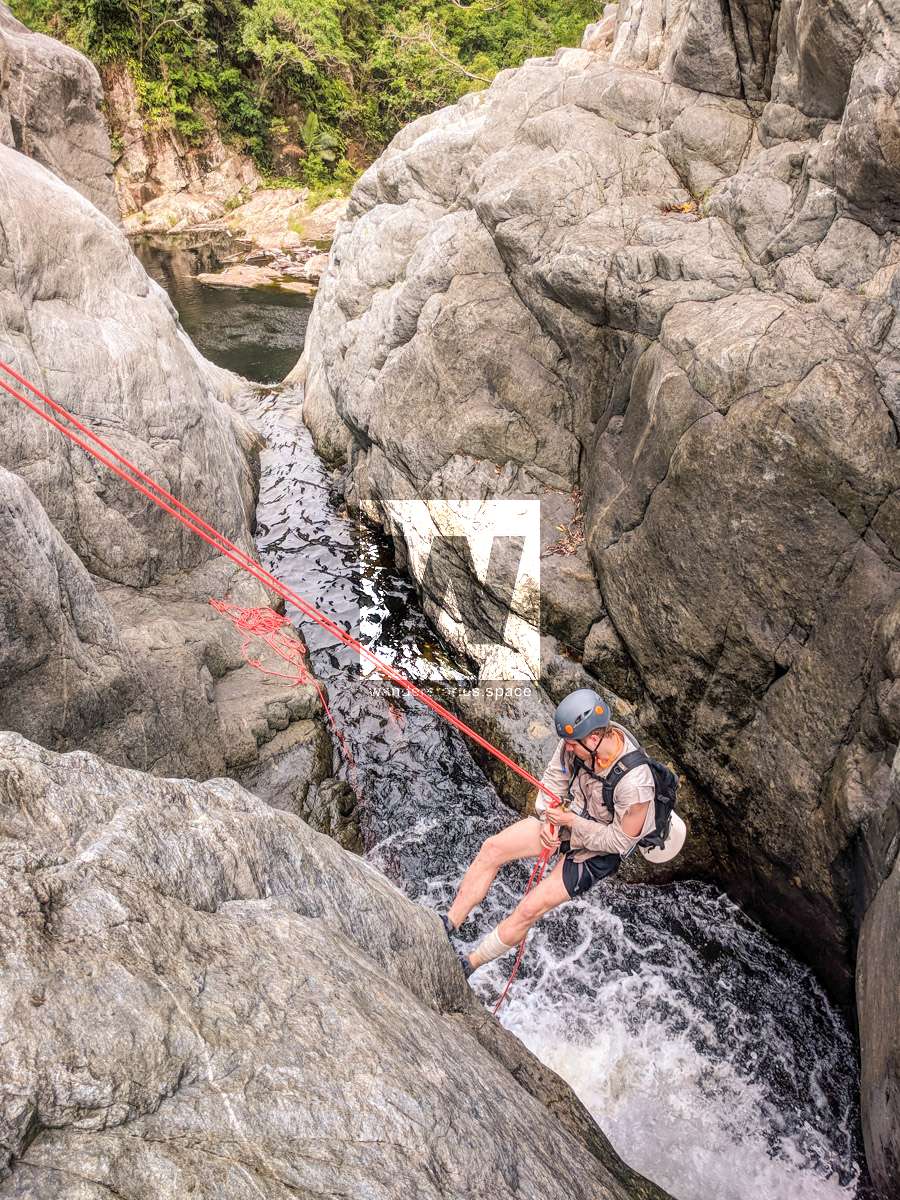
Getting Ready To Abseil
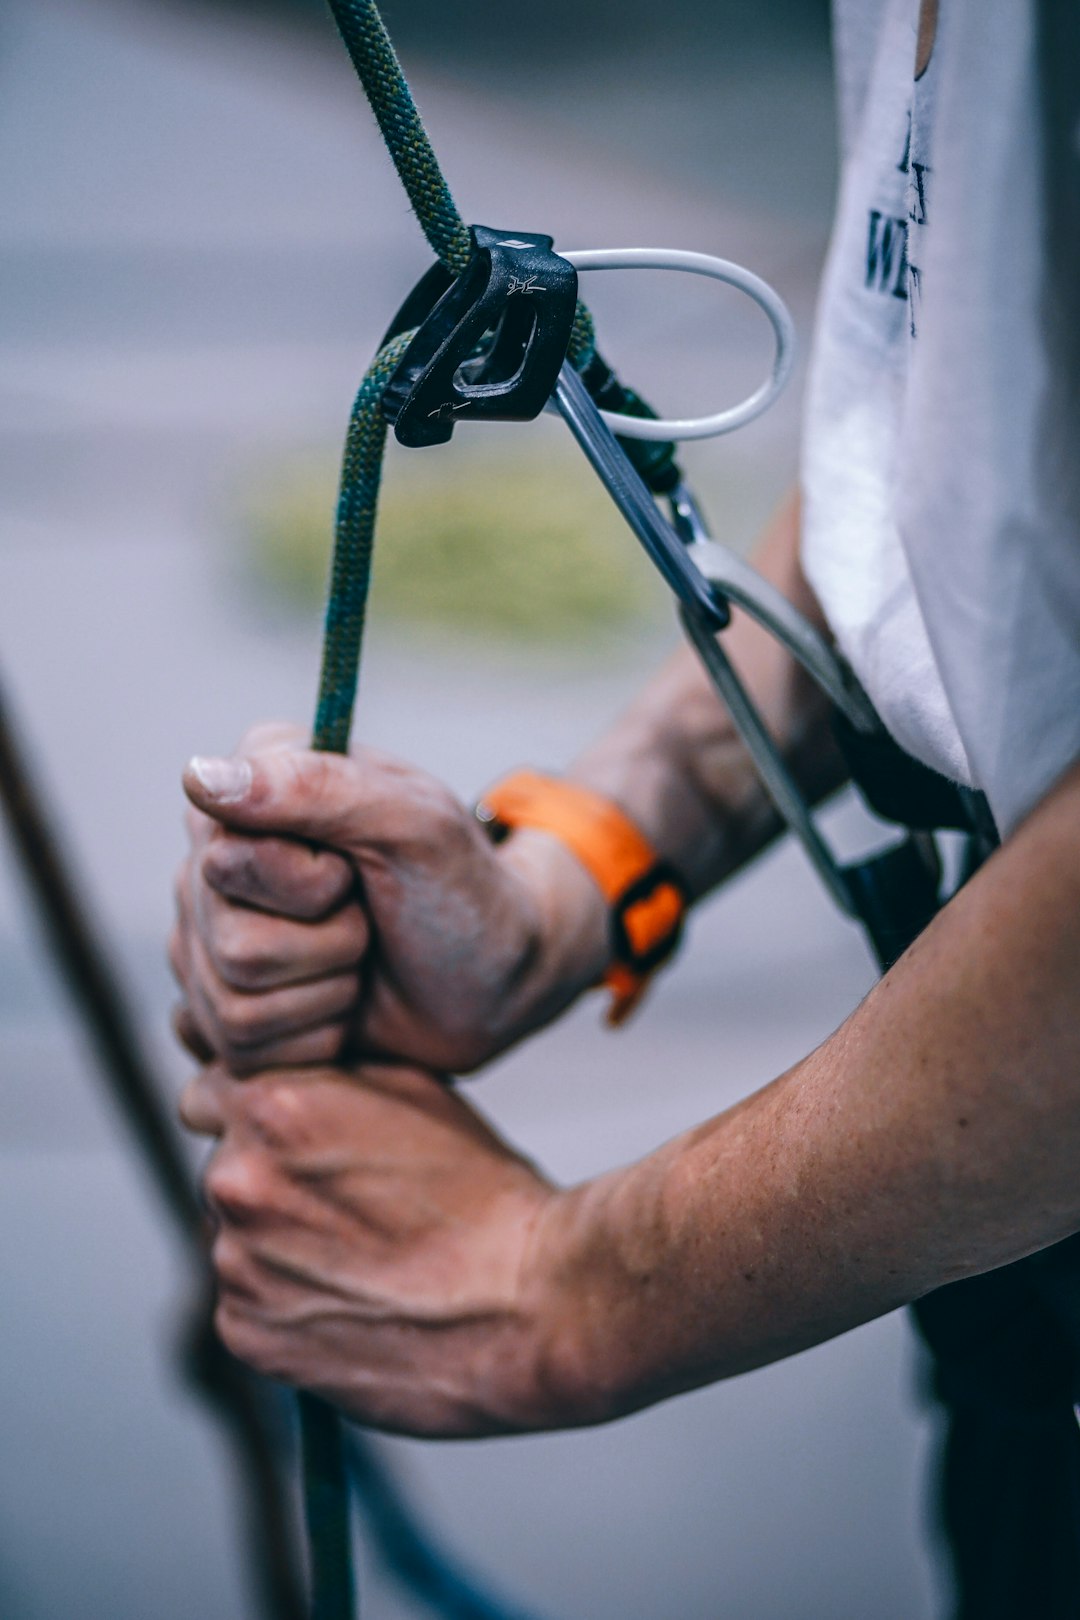
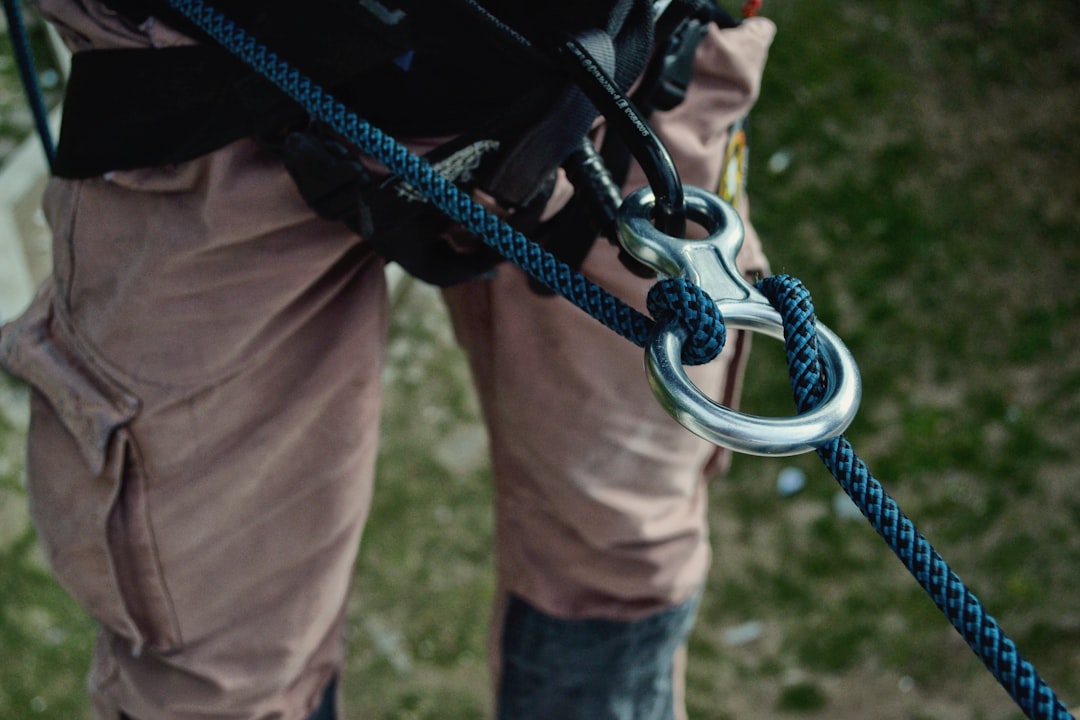
Put your harness on, and check out the available anchors surrounding the rappel. If safe and available, natural anchors, like tree trunks or chockstones, can be used; otherwise, there may be artificial anchors, such as glue-ins or expansion bolts with fixed hangers and rappel rings/mallions.
- Put yourself on safety, and examine the integrity of the anchors. In the tropicals, rats often gnaw the webbing.
- If using double-rope technique (DRT), thread the rope through the maillon, tape, or ring to the halfway point. As you become more advanced, you may start using single-rope techniques (SRT) and rescue techniques, such as the munter hitch, which allows you to lower a stranded abseiler, if needed. The techniques used will depend on your experience, preference and environment. Some people prefer to use a blocker on one side of the anchor and abseil on the single rope on the other side for a smoother descent than using DRT. The most common type of device is a figure-8 style.
- Tie stopper knots in both ends of your rope, coil your rope, and throw it down.
Sometimes, it's best not to tie stopper knots and to abseil off the end of your rope once in the water than to get stuck - whether it's a stuck rappel device, trouble in a pool of water with strong flow, or having to trend water to get off the rope. If the ends are just above or in a pool and visible from the top, you can leave them off. - Before taking off your safety and abseiling, always recheck your anchor and device setup. Do a mini-test rappel while still on safety. There is no room for complacency; even if other people have gone down before you, things can change. If some of the webbing/tube-tape at the anchor looks worn or tired, add your own and tie a water/tape-knot. As you're abseiling, feel and visually inspect the rope as you descend, especially where there are edges and abrasion occurring.
Abseiling
There will likely be a number of abseils ahead of you.
- Put a prusik knot on the rope, or have the person that abseiled before you belay you from the bottom (i.e., fireman belay).
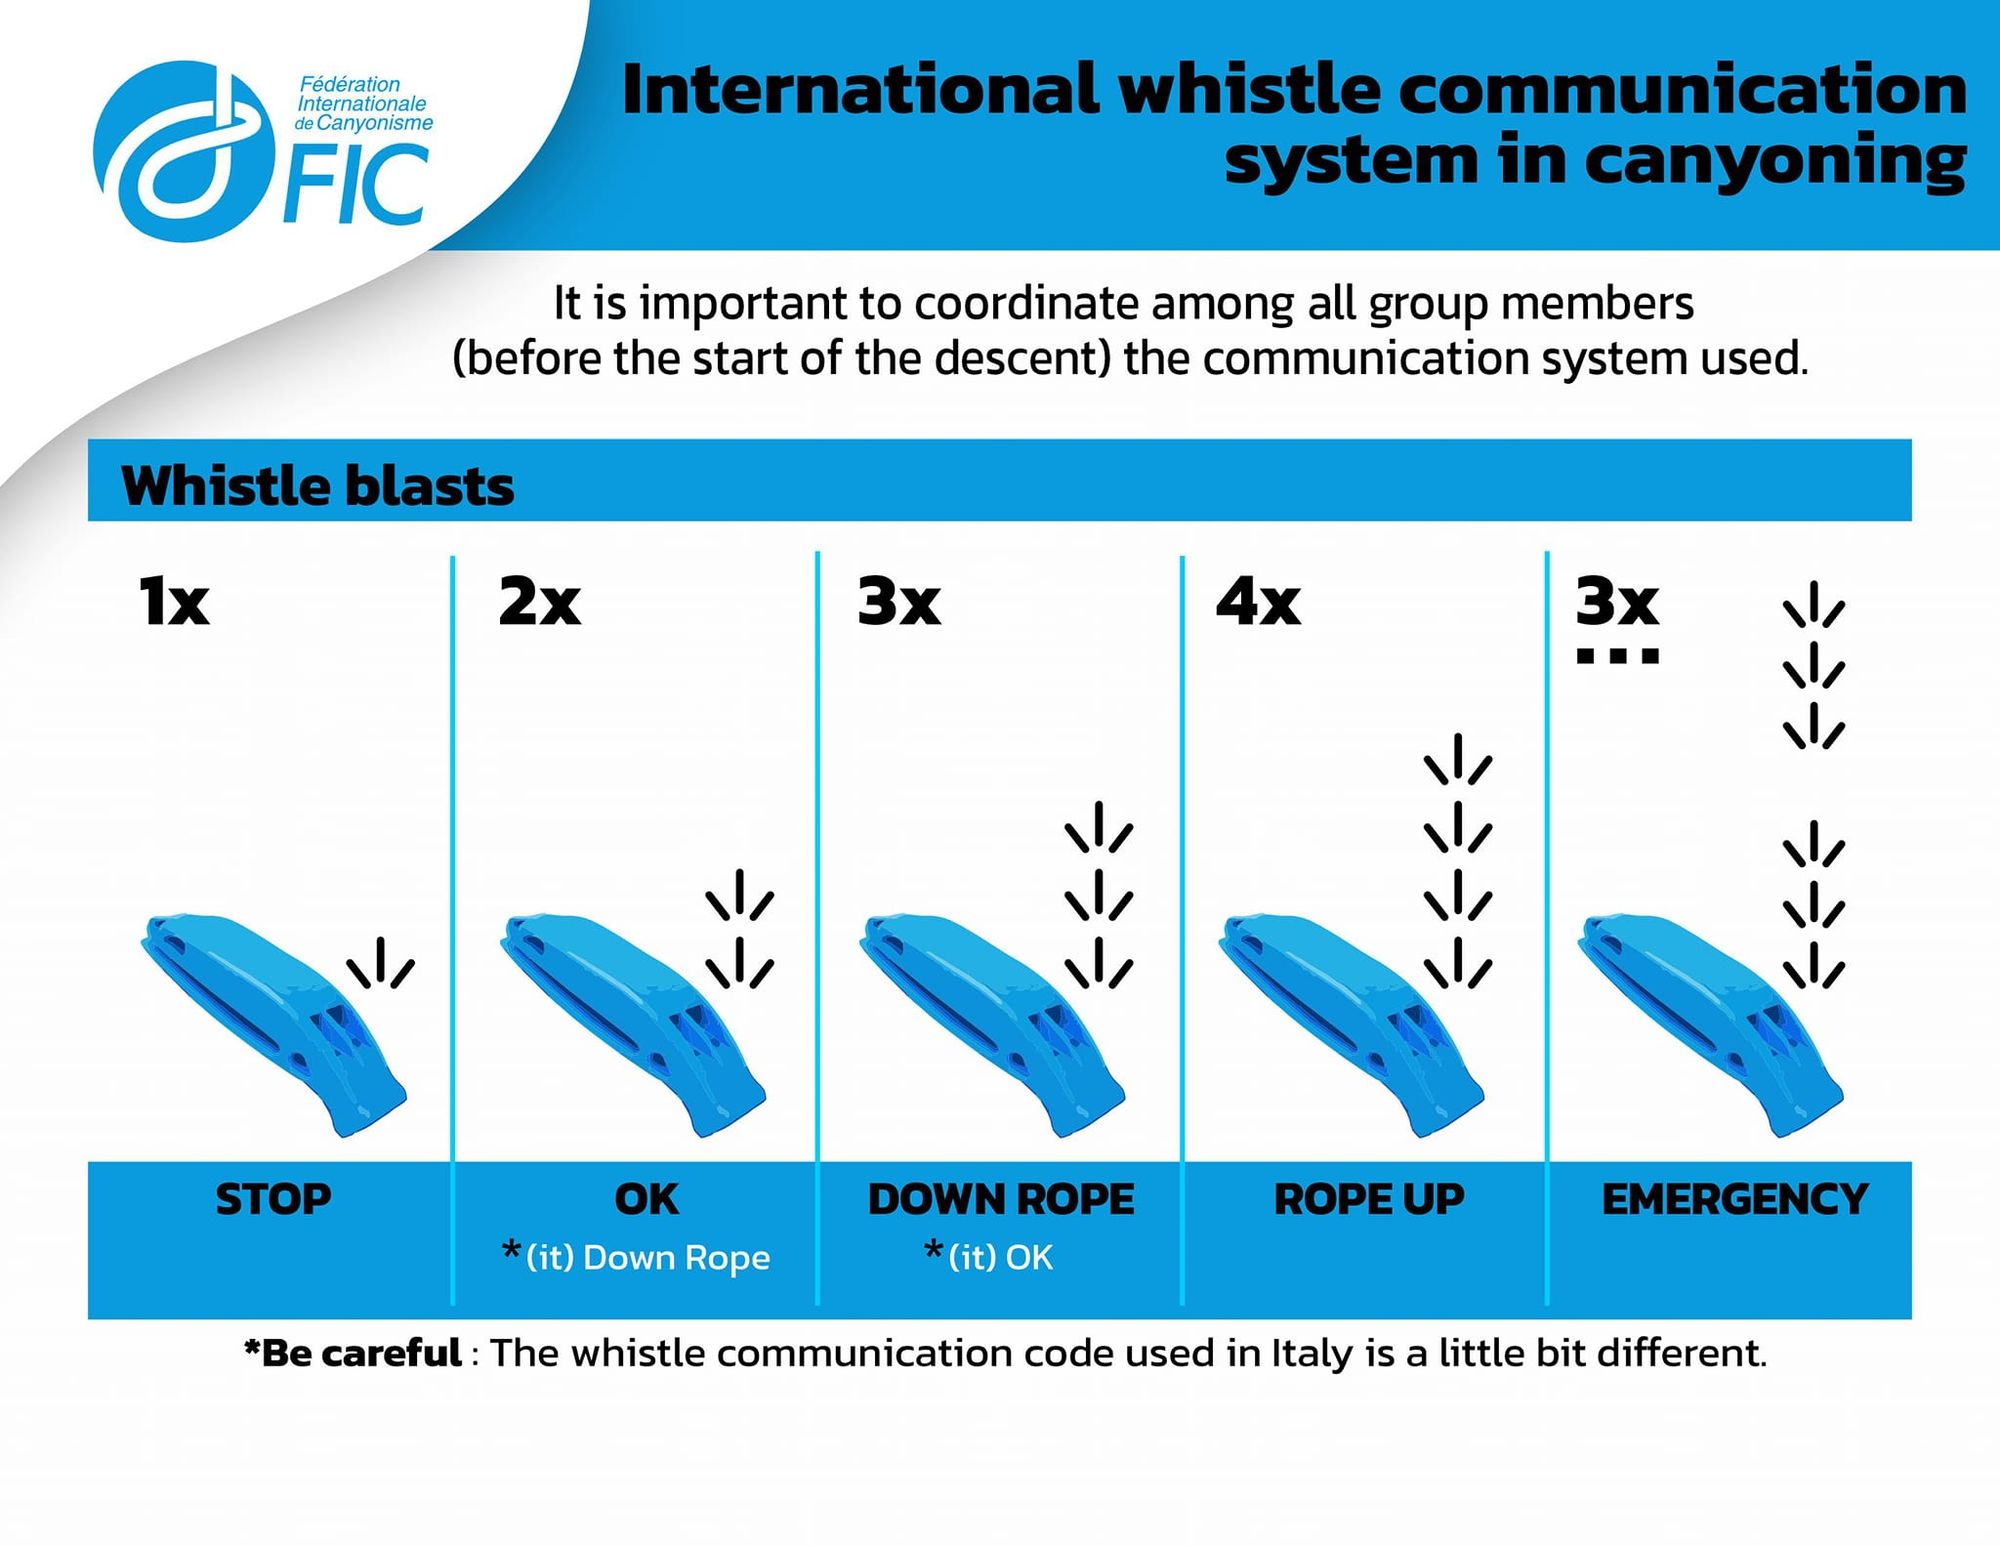
- When you get to the bottom of the abseil, yell "Off Rope!" so that the next person can rappel down. If there is a chance your group cannot hear you (e.g., loud waterfalls), discuss a plan and develop a signal system before any rappels commence.
- Once the whole party is down, untie your stopper knots, and pull one end of the rope quickly and smoothly (DRT). Yell "Rope!" as the rope drops. Ideally, the most experienced canyoners in the group should be the first and last down.
As your skills improve, so will your appetite for more difficult trips. The difficulty of a canyon is based on its ease of access, the awkwardness of abseils, commitment levels, and navigation. You will never stop learning new skills and techniques, especially as knowledge and technology evolve over time. If you enjoy the experience, you should be learning basic rescue techniques and 'rig for rescue'.
Top Tips
- Point out sharp edges to others. Abseil in a straight line to avoid rubbing your rope from side to side. Try not to bounce up and down for the same reason, to avoid abrasions on your rope. When possible, use someone's bag as a rope protector on an edge, and tether it to the anchor; the last person must remove it before abseiling.
- Avoid terrain traps. These can be V-grooves, cracks, or even just an odd angle that can jam the rope. Then, when you unload your rope, it will expand, making it difficult to free from these traps.
- Remover to check all anchors, like bolts and webbings before and after each use.
- When starting out, abseil down a canyon with either a guide, tour group, or other experienced canyoners. There are a few qualified guides in Townsville.
- There is no universal whistle signal system for canyoning. Each country and group have their own system. Some countries have more than one system, and they are significantly different from each other. Some are relatively complex similar to Morse code. Know and understand the local signalling system (whistle, hands, verbal) and check with your team that you are all on the same page beforehand. Communication is important. See these two whistles: Rodcle Whistle and Storm All-Weather Whistle.
- Keep group numbers to a maximum of eight. The ideal group number is four - two teams of two, each carrying a rope - making for a perfect balance between speed and safety in numbers. The minimum number is three - one can go get help, and one stays with the injured.
- Be able to partner and self rescue. It is a good idea to carry two ropes and rescue gear (e.g., a minimal kit may consist of a VT prussic, a Tibloc, and a few carabiners). A few spare carabiners and some cord can go a long way if you have the knowledge/skills.
- Remove all jewellery, and tie long hair out of the way to stop it from being caught in the descender.
- A few people prefer not to use ATCs as they have a small thermal mass and will become hotter faster than other devices. However, ATC's are a more versatile device than others for things like belaying two climbers coming up a slippery pitch, or being able to stop abseiling on one line and keep going on the other cleanly, etc. Consider using a canyoning-specific device and get to know it well.
- Throw your rope down below you first before abseiling. This way, it's less likely for your rope to get caught or knock any loose rocks down on top of your head.
- Wear a helmet.
- Fingerless gloves are comfortable and can assist you on your rappel.
- Know your knots. The connection between your harness and a rope will often be the only thing between you and a nasty injury or death.
- If using a double-rope technique (DRT), ensure the rope is not twisted. Keep both strands neat, and consider how the knot will pass over the edge.
- A VT Prusik is great for ropework and rescue as you can go down a rope under tension.
- Keep a set of dry clothes in the car.
- When cliff jumping, the first person abseils or downclimbs and then checks the pool with a dive mask. If they give the thumbs up, throw your bag down first, or hold it in your hands as you jump. If you wear it on your back, you can be jerked up by your shoulders when you hit the water, especially on high jumps.
- If there is a pack swim, lie on your pack, or push it in front of you, rather than having it on your back. This will allow for an easier swim and keeps your head out of the water.
- Many people get nervous leaning back into the proper position required to abseil off of the cliff. Try using your shins and knees to get closer to the wall. To get down overhangs, try to get your bottom as far over the edge as possible before letting your feet come down. Bums down!
- Expensive canyoning shoes are great, but Dunlop Volleys or the $10 K-Mart wetsuit reef walker booties are just as fantastic but do not provide ankle support. Avoid runners/joggers, as the material is super slippery on rocks, in my experience.
- Mossy rocks can be difficult to negotiate. Don't be afraid to slide over these sections on your bum - just watch out for your harness. Getting down low will lower your centre of gravity, add more friction, and you'll have less of a distance from which to fall. You'll also feel much more comfortable.
- Use common sense when having fun in canyons, and keep your wits about you. Always think before you throw the rope, abseil, jump, slide, swim, pull the rope, and start the canyon.
If you've never abseiled before, try going with an experienced friend to a crag with top rope access, like Mount Stuart, to learn. Once you get the hang of it, try the top three rappels of Jourama Falls in the dry season; it's a beautiful place to have your first canyoning experience. Alternatively, Little Crystal Canyon.
Equipment Checklist
- Harness
- Helmet
- Descender (Figure 8, ATC, Pirana, Totem, Rack, etc)
- Third hand (Prusik)
- Sling
- 60m static rope
- Quick-dry clothing
- Canyoning shoes (or Dunlop volleys / wetsuit booties)
- Spare tube-tape/webbing
- Dry bags
- Backpack
- Head-torch
- Canyoning guide
- Navigation tools
- First Aid Kit & Personal Locator Beacon (PLB)
Glossary of Terms
Anchor: A secure point from which to abseil.
Belay: Controlling the rope that is fed out to the climber or abseiler.
Canyoning: Also referred to as canyoneering. Following a watercourse that has drop-offs, waterfalls, gorges, canyons, and/or caves and involves rock hopping, scrambling, jumping, abseiling, and/or swimming.
Chockstone: A rock or boulder that is wedged into a crack or a large boulder that is in contact with another large rock.
Descender: An abseiling device used to descend down a rope.
Third hand: A backup device for when you are abseiling; also called an autoblock.
Prusik: A funky knot that can be easily moved when it is not under load, but when it is loaded, it's secure and will hold you in position. A prusik is commonly used as a backup when abseiling, but can also be used to ascend a rope.
Static rope: A non-elastic, non-stretchy rope that is preferred for abseiling and canyoning. Most canyoneering ropes are dry-treated, meaning that they are hydrophobic and will float.
Maillon: Also known as a quicklink, it is similar to a carabiner. A maillon is an oval-shaped piece of metal used on fixed hangers or webbing to pass your rope through. Chain links are also commonly threaded through webbing.
Webbing: Also known as tube-tape, this tubular material is often made of nylon or UHMWPE (Spectra/Dyneema) and its most common application is in constructing slings and anchors used in rock climbing and canyoneering.
Tape-knot: Also known as a water-knot, it's a common knot used to join two ends of webbing, usually around a tree trunk. See also Beer Knot.
Single-rope technique (SRT): A set of methods used to descend and ascend on a single rope - often used in caving, rock climbing, canyoning, and rope access.
Double-rope technique (DRT): A set of methods using two ropes or halving the rope to ascend or descend - often used in canyoning.
DISCLAIMER
Roped activities are high risk and are dangerous. Mistakes can be fatal. The information in this article is based on my own opinions, experiences, and research. The information is not formal instruction, nor is it any substitute for formal instruction or qualified canyoning guiding. You certainly should not trust your life to anything that you read on this or any website. People who rely on you could die. Do your own research and testing, get formal instructions and qualifications, and read the appropriate literature.
While I don't want to turn you off canyoning, I can't stress enough the need for safety. People die canyoning, and most accidents are the result of human error. Make sure you know what you are doing and the risks involved.
The track notes on this website are for use by appropriately qualified and experienced people. Creeks are ever-changing, the wet season comes every year, washing rocks, logs, and trees downstream. Many belay points are off chockstones, logs, and/or trees, and track notes can become incorrect. Webbing can be easily damaged and may have been removed by other parties. Pools fill up with sand, and shallow sections deepen.
Track notes are, at best, a guide - an indication of the creek or canyon at the time they were written or updated. Track notes can rapidly become outdated and are no substitute for appropriate experience. Parties that venture into canyoning areas need to be prepared for ever-changing conditions.
This article, and all other articles, are for entertainment purposes only and are not to be used as a guide. Please see our Disclaimer for more information.